
Sar Pass Trek
India’s most stunning winter summit, made for first-timers and seasoned trekkers alike.
Sar Pass Trek: Complete Overview
Sar Pass Trek is a five-day Himalayan trek in Himachal Pradesh. You walk on snow in the middle of Indian summer. That’s not a typo. Most snow treks make you go in winter, when trails close and cold turns brutal. Sar Pass flips that around.
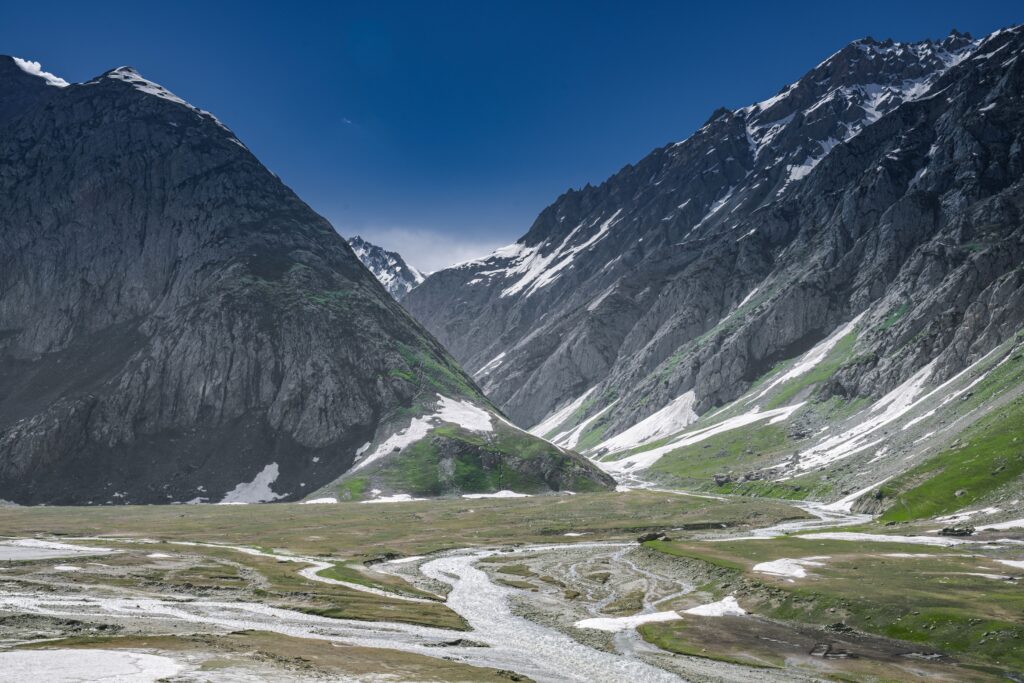
You start from Kasol in the Parvati Valley. You climb through forest and meadow. You cross a genuine snow pass at around 13,800 feet, usually in May or June, green valleys on both sides of the white. It’s rated easy to moderate. That makes it one of the more forgiving high-altitude treks in India for a first-timer with reasonable fitness. It is not a walk in the park, though. One day on this trek decides how hard it actually felt. That day is coming.
5 Reasons Sar Pass Trek Stands Apart
Click each reason to read the full story.
Sar Pass Trek offers a mix of green forests, open meadows, snow-covered trails, and wide mountain views. The changing scenery keeps the trek interesting from the first day to the summit.
Snow is one of the main attractions of Sar Pass. During the right season, you can walk through snowy trails, cross snow-covered slopes, and enjoy the famous snow descent near Sar Pass.
Sar Pass is a popular choice for people starting their Himalayan trekking journey. The trail includes forests, climbs, descents, and snow sections, giving beginners a good introduction to mountain trekking.
The trek begins around the scenic Parvati Valley, known for its forests, mountain villages, and river views. The journey also gives you a chance to experience the peaceful surroundings around Kasol.
Reaching Sar Pass gives you a strong sense of achievement. The high-altitude trail, changing landscapes, and summit views make the trek feel rewarding without requiring a very long trekking expedition.
Sar Pass Trek: Detailed Day-by-Day Guide
| DAY | ROUTE | DISTANCE | DURATION | START ALTITUDE | END ALTITUDE |
|---|---|---|---|---|---|
| 1 | Kasol → Grahan Village | 9 km | 4–5 hrs | 5,100 ft | 7,700 ft |
| 2 | Grahan → Min Thach | 7 km | 4–5 hrs | 7,700 ft | 11,150 ft |
| 3 | Min Thach → Nagaru | 8 km | 4–5 hrs | 11,150 ft | 12,500 ft |
| 4 | Nagaru → Sar Pass → Biskeri Thach | 14 km | 7–8 hrs | 12,500 ft | 10,000 ft |
| 5 | Biskeri Thach → Barshaini | 7 km | 3–4 hrs | 10,000 ft | 6,600 ft |
Quick stats: Distance: 9-10 km | Time: 4-5 hrs | Altitude: 2,100 ft (650 m)
Day one is a warm-up. It doesn’t feel like one halfway up. You start from the centre of Kasol and follow the Grahan Nalah upstream, keeping to its left bank. The path is well-worn at first, used daily by villagers heading up to Grahan. After crossing the nalah, the trail turns rocky. It climbs steadily uphill, away from the riverbank and into thicker forest.
Somewhere in that climb, the trees thin out. You get the first real view back down toward Kasol. Tarpaulin stalls selling tea and rhododendron syrup line the path, run by locals who’ve set up shop right where trekkers need a break. That stall is a useful landmark, not just a curiosity. It means you’re roughly an hour of steep climbing from Grahan. Grahan sits on top of a hill, ringed by dense forest. It’s the last point on the trek with any reliable mobile signal. Make your calls here. From Grahan onward, you’re off the grid.
Quick stats: Distance: 7 km | Altitude: +3,100 ft (940 m) | Time: 4-5 hrs
Why not push straight to Nagaru from here? Altitude, mostly. The trail out of Grahan heads north on a gentle path, well used by locals moving cattle. After a while the route steepens and narrows into forest. The walking gets genuinely confusing in a couple of spots where the path isn’t obvious. Stick close to your guide through that stretch.
Min Thach is a wide grassy ridge that opens up after the forest. Villagers graze cattle here, and it’s the most scenic campsite before Nagaru. From here you see Chanderkhani and the surrounding ranges to the northwest. On a clear evening, the sunset over the snow-line is worth the climb by itself.
The reason this day exists as its own stop, instead of pushing on toward Nagaru, is altitude, plain and simple. You’ve climbed roughly 3,500 feet in two days by the time you reach Min Thach. Skipping ahead to Nagaru in one push is technically possible for a fast, fit group. But it raises your risk of acute mountain sickness meaningfully. A full day here lets your body catch up before the terrain gets harder.
Quick stats: Distance: 8 km | Altitude: +1,700 ft (520 m) | Time: 4-5 hrs
This is the first day where a wrong step actually matters. The trail from Min Thach doesn’t run straight up the visible ridgeline to Nagaru. It curves south into forest first, then climbs onto a second, rockier ridge overlooking the meadow below. That ridge narrows as you go. On one side, the ground drops away steeply toward the valley floor.
If there’s snow on the trail here, and there often is between April and early June, the risk isn’t the gradient. Its exposure combined with slick footing on a path that’s already narrow. Waterproof gloves and a trekking pole earn their keep on this stretch. Guides frequently use an ice axe to cut footholds when the snow is packed hard.
Nagaru itself sits on a flat clifftop that appears almost without warning after the climb. The view north opens onto the full Parvati Valley, the town of Manikaran visible far below. Winds pick up fast once the sun starts dropping. Camp gets set up quickly, dinner happens early. Tomorrow is the long day.
Quick stats: Altitude: 1,300 ft | Distance: 14 km | Time: 7-8 hrs
Summit day runs 7 to 9 hours. The hardest two are before the pass, not after. You start before dawn, while the snow is still firm underfoot and the weather is at its most predictable. Conditions in the high Himalayas can shift fast by early afternoon. That’s exactly why every operator pushes an early start on this specific day. The climb follows the ridgeline south, through a couple of genuinely steep stretches. You’ll use the same slow, deliberate technique from Day 3, just for longer.
Reaching the top brings the payoff. Sar Pass sits at roughly 13,800 feet, marked by a flag tied to a trishul. The peaks of Tosh Valley show to the east. A wide field of snow stretches south. The name itself comes from “Sar,” meaning pond, a small body of water at the top that stays frozen well into summer.
Then comes the part everyone asks about beforehand, and every brochure undersells: the slide down. This isn’t a metaphor. It’s a genuine glissade down a snow slope on the far side, roughly a kilometre in one stretch, repeated over two or three shorter slopes as you descend toward Biskeri Thach.
- Keep your legs together and don’t dig your heels in to slow down.
- Tuck loose items like phones and sunglasses inside your bag before you start.
- Keep your elbows firmly by your side, and push your weight back into the snow if you need to slow yourself.
It’s fast. It’s genuinely fun once you commit. And it’s over faster than the anxiety about it usually lasts. Biskeri Thach waits at the bottom, a quiet meadow with pine forest as a backdrop and a stream running right past camp.
Quick stats: Distance: 7 km + 16 km | Altitude: -3,400 ft
The hardest climbing is over. The trail still asks something of you. From Biskeri, a steep path drops alongside a stream. It leads to a stream crossing that catches a lot of tired trekkers off guard. In at least two documented accounts of this exact crossing, trekkers rappel down a short rock face on a fixed rope, then cross on wooden planks laid over the water. It’s not technical. But it’s not nothing either, especially on legs that spent yesterday sliding down a pass.
Past the crossing, the trail runs through forest toward the twin villages of Pulga and Tulga. It crosses a bridge over the Parvati River to reach Barshaini, the last motorable point in this stretch of the valley. From Barshaini it’s roughly a 15 km drive back to Kasol, usually about an hour depending on road conditions. That’s where the trek officially ends.
How Difficult Is the Sar Pass Trek: Honest Assessment
Sar Pass Trek is graded easy to moderate. That label hides more than it tells you. Here’s the real breakdown, day by day. Four of the five days suit a fit beginner just fine. Day 1 to Grahan is a steady forest climb, nothing technical. Day 2 to Min Thach opens into meadow walking, with one steeper push near the top. Day 3 to Nagaru gets rockier and narrower. This is where fitness starts to matter more than willpower.
Then there’s Day 4. Day 4 is the one day that decides whether this trek felt moderate or felt hard. You’re looking at 7 to 9 hours on foot. A steep ridge climb through snow leads to the pass at 13,800 feet. Then comes a slide down the other side. Some people find it thrilling. Some people find it genuinely frightening. The terrain that day includes narrow ridgelines with real exposure on one side. Slip there and it’s not a scraped knee.
Sound harsh? It happens on nearly every batch. Trek leaders carry ice axes and gaiters for exactly this stretch. Groups move slowly and deliberately through it. Not because the whole trek demands that pace. Because this specific section does.
The Sar Pass Trek has moderate terrain with a mix of forest trails, steep climbs, open meadows, rocky paths, and snow-covered sections. The trail from Kasol to Grahan passes through dense forests, while the route towards Min Thach and Nagaru becomes steeper. The summit day is the most demanding, with a climb to Sar Pass followed by a steep descent through snow. Snow conditions can make the trail slippery and slow. Good fitness, proper trekking shoes, and careful pacing are important. Beginners with basic trekking experience and regular physical training can manage the trek with proper preparation.
| MONTH | DAY TEMPERATURE | NIGHT TEMPERATURE | WEATHER & TRAIL CONDITIONS |
|---|---|---|---|
| April | 8°C to 15°C | -2°C to 4°C | Cold with snow on higher sections; trails can be slippery. |
| May | 12°C to 20°C | 0°C to 5°C | Pleasant days with snow-covered sections near the pass. |
| June | 15°C to 22°C | 2°C to 8°C | Mild days, clear mornings and some snow at higher altitudes. |
| July | 15°C to 20°C | 5°C to 10°C | Monsoon begins; rain can make trails wet and slippery. |
| August | 15°C to 20°C | 5°C to 10°C | Heavy rainfall, cloudy weather and slippery trail conditions. |
| September | 12°C to 20°C | 2°C to 7°C | Post-monsoon weather with clearer skies and cooler nights. |
| October | 10°C to 17°C | 0°C to 5°C | Cool and mostly clear; temperatures drop at higher camps. |
| November | 5°C to 12°C | -5°C to 2°C | Cold conditions with increasing chances of snowfall. |
Sar Pass has changing weather because the trail climbs from Kasol to around 13,800 ft. May and June are generally the main trekking months, with snow still present at higher sections. July and August bring monsoon rain, while September and October are cooler and usually clearer. Temperature also drops sharply at the higher camps, especially after sunset.
Altitude & Acclimatization
The Sar Pass Trek starts at around 5,600 ft in Kasol and reaches a maximum altitude of about 13,800 ft at Sar Pass. The steady rise in altitude gives your body time to adjust as you move from Kasol to Grahan, Min Thach, and Nagaru. Nagaru is the highest campsite, so spend the evening resting and avoid unnecessary activity. Drink enough water and maintain a slow, steady pace throughout the trek. Headaches, nausea, dizziness, or unusual tiredness can indicate altitude sickness. If symptoms become severe or do not improve, inform your trek leader and descend to a lower altitude.
Follow your trek leader’s instructions, especially on steep, snowy, or slippery sections.
Walk at a steady pace and avoid rushing on summit day.
Carry a basic first-aid kit, personal medicines, water, snacks, and a headlamp.
Wear proper trekking shoes with good grip and carry warm, waterproof layers.
Inform your trek leader immediately if you experience severe headache, vomiting, dizziness, breathing difficulty, or extreme weakness.
In case of serious altitude sickness, descending to a lower altitude is the safest response.
Weather can change quickly, so the itinerary may be adjusted for safety.
The trail has limited road access. Grahan, Min Thach and Nagaru are remote campsites, so evacuation can take time.
In an emergency, the trek team should coordinate evacuation towards the nearest accessible roadhead, generally through Barshaini/Kasol, depending on the location and trail conditions.
Do not leave the group or attempt an emergency descent alone.
Best Time to Do the Sar Pass Trek: Season by Season
Pick April if you want snow. Pick June if you want an easier climb. That’s the real trade-off inside the “April to June” window every operator advertises. Almost nobody explains it. April and early May bring the heaviest snow cover on the pass. Scenery peaks. But the Nagaru-to-Sar Pass stretch gets tougher, more snow underfoot, colder mornings at camp. Late May into June flips the trade. The trail dries out. Footing gets predictable. The climb to the pass is noticeably easier, though you’ll see less of the deep snow that makes this trek famous in photos.
Avoid July and August outright. Monsoon turns the trail slippery and raises real landslide risk on the lower forest sections near Kasol and Grahan. Winter, October through March, buries the upper trail in deep snow. Most operators close the route entirely during that window.
Spring brings gradual changes to the trail, but snow can still cover the higher sections. Late April can be suitable when the trekking route opens and conditions are stable. Expect cold nights and snow around higher camps.
May and June are the main trekking months for Sar Pass. The weather is pleasant during the day, while snow remains on several higher sections. May is particularly popular for experiencing snowy trails, while June usually offers warmer daytime conditions.
The Parvati Valley receives monsoon rain, which can make forest trails wet, muddy, and slippery. July and August are generally avoided for Sar Pass trekking. Conditions may improve in September, but trail and weather conditions should be checked before planning.
Post-monsoon weather brings clearer skies and cooler temperatures. September and October can offer pleasant trekking conditions, although snow on Sar Pass may be limited compared with the spring season. October nights become quite cold at higher camps.
How to Reach Sar Pass Trek: Complete Travel Guide
Reach Kasol the evening before, not the morning of. Overnight buses from Delhi or Chandigarh to Kasol run routinely late. Missing your operator’s morning reporting time can mean missing the trek start entirely. Building in one extra evening removes almost all of that risk.
- Bus: Overnight government or private buses run from Delhi (roughly 14 hours) and Chandigarh (roughly 10 hours) to Kasol or nearby Bhuntar.
- Train: Chandigarh and Pathankot are the nearest railheads. Both need a further bus or taxi connection of several hours to reach Kasol.
- Flight: Bhuntar Airport is closest, roughly an hour from Kasol by road, though flight availability and pricing can be unreliable on this route.
The easiest way to reach the Sar Pass Trek from Delhi is by road. Take an overnight bus from Delhi towards Bhuntar or Kasol. Bhuntar is the main gateway to Parvati Valley and is around 30 km from Kasol. From Bhuntar, you can take a local bus, shared taxi, or private cab to Kasol. Direct buses to Kasol are also available during the trekking season. If you prefer flying, take a flight from Delhi to Bhuntar Airport (Kullu-Manali Airport) and continue by road to Kasol. Try to reach Kasol at least one day before the trek. This gives you enough time to rest, collect your trek equipment, and attend the briefing without rushing on the first trekking day.
Travellers from Mumbai can reach Sar Pass most conveniently by taking a flight to Delhi or Chandigarh and continuing by road to Kasol. You can also check flights to Bhuntar Airport, which is the closest airport to Kasol. From Bhuntar, Kasol is roughly 30 km away and can be reached by local bus, shared taxi, or private cab. If you fly to Delhi, you can take an overnight bus towards Bhuntar or Kasol, making the journey more economical. Avoid planning your arrival on the morning your trek starts. Mountain travel can take longer than expected, especially during busy periods. Reaching Kasol a day early gives you time to rest, check your backpack, and prepare for the trail.
From Bangalore, flying is the most practical option. Take a flight to Delhi or Chandigarh, and from there continue towards Kasol by bus or cab. Another option is to fly to Bhuntar Airport, the nearest airport to Kasol, and take a taxi to the base. Bhuntar Airport is around 30–31 km from Kasol, although flight availability can be limited, so check the schedule before booking. If you travel through Delhi, an overnight bus towards Bhuntar or Kasol can save you a night’s accommodation. Keep a good time buffer because mountain roads can face traffic and delays. Plan to arrive in Kasol at least one day before your Sar Pass trek begins.
The Sar Pass route finishes at Barshaini, after descending from Biskeri Thach. From Barshaini, trekkers generally take a local taxi or shared vehicle back to Kasol. Keep your return travel flexible because the descent, weather, and road conditions can affect your arrival time. If you have a bus or flight from Delhi, Chandigarh, or Bhuntar, avoid booking a connection immediately after the trek. A safer plan is to spend the night in Kasol after returning from Barshaini and start your journey home the following day. If you are catching a flight from Bhuntar, keep extra road-travel time as a buffer. For long-distance buses, confirm the boarding point in advance and keep your phone, ID, money, and important documents easily accessible.
Kasol is the most convenient place to stay before and after the Sar Pass Trek because it is the trek’s main base. Many trekking groups assemble in Kasol before starting the trail, and accommodation ranges from budget guesthouses and hostels to hotels and homestays. Before the trek, choose a place close to the meeting point so you do not have to carry your backpack far on the morning of departure. After returning from Barshaini, you can travel back to Kasol and stay overnight before beginning your journey home. If you prefer a quieter stay, areas around Chalal and Manikaran are alternatives, but Kasol is more practical for transport and trek-related arrangements. Book your stay in advance during the busy May–June trekking season.
What the Sar Pass Trek Experience Is Like: Camps, Food, Stay
The Sar Pass Trek is a camping-based Himalayan experience, with a mix of village accommodation and tents depending on the operator and itinerary. The trek usually starts from Kasol and passes through Grahan, Min Thach, Nagaru and Biskeri Thach before descending towards Barshaini.
The camps are set in different landscapes as you gain altitude. Grahan Village is usually the first overnight stop, where trekkers may stay in a simple village homestay or guesthouse. After Grahan, the accommodation changes to tents at higher camps such as Min Thach, Nagaru and Biskeri Thach. These camps are basic but give you a close experience of the mountains. At Nagaru, the high altitude means nights can be especially cold.
Food on the Sar Pass Trek is generally simple, vegetarian and designed to provide enough energy for long trekking days. Depending on the operator, meals can include breakfast, lunch, evening snacks and dinner. Common trekking meals include dal, rice, vegetables, roti, noodles and other easy-to-cook dishes. Carry some personal snacks such as dry fruits, energy bars or chocolates for the trail. YHAI also describes its Sar Pass meals as simple and nutritious vegetarian food.
Hygiene facilities on the Sar Pass Trek are basic, especially after leaving Kasol. In Kasol and Grahan Village, you can usually find regular toilets and access to basic washing facilities. At higher camps such as Min Thach, Nagaru and Biskeri Thach, facilities are limited. Trek operators generally arrange temporary toilet tents or designated toilet areas near campsites. Hot showers are usually not available at high-altitude camps, so carry wet wipes, hand sanitiser and biodegradable soap for personal hygiene. Avoid using streams or natural water sources as toilets, and always follow your trek team’s waste-disposal instructions. Keep toilet paper and sanitary waste in sealed bags and carry them back for proper disposal. A small personal hygiene kit will make the multi-day trek much more comfortable.
6:00–7:00 AM: Wake up and freshen up at the campsite.
7:00–8:00 AM: Have a warm breakfast and prepare your backpack.
8:00–9:00 AM: Attend the trek briefing and begin the day’s hike.
During the trek: Walk at a steady pace with short breaks for water and rest.
Lunch: Have packed lunch on the trail or a meal at the next campsite, depending on the day’s route.
Afternoon: Continue trekking towards the day’s destination.
3:00–5:00 PM: Reach the campsite, depending on the route and weather.
Evening: Rest in your tent, have tea or snacks, and enjoy the mountain surroundings.
7:00–8:00 PM: Have dinner and attend the briefing for the next day’s trek.
9:00–10:00 PM: Get ready for bed and rest early for the next day’s hike.
Sar Pass Trek Packing List: What to Carry
A packing list is not the same as a priority list. Every major operator flags certain items as genuinely essential, not optional. Waterproof gloves and a proper headlamp are the two things new trekkers most often skip and regret, especially on the Day 4 push over the pass in early-morning cold.
Clothing: The Layering System
Layering
- Quick-dry trek pants, 2-3 pairs
- Full-sleeve collared t-shirts, 2-3
- Fleece jacket or layer
- Down jacket or heavy windproof jacket
- Thermal inners, upper and lower
- Woolen cap, balaclava or buff
- Waterproof gloves, plus a warm inner pair
Accessories
- Backpack, 50-60 litres, with rain cover
- Day pack, 20-30 litres, if offloading
- Trekking pole
- Headlamp with spare batteries
- Sunglasses with UV protection
- Sunscreen, SPF 30 or higher
- 2 water bottles, 1 litre each
Gear
- Trekking poles: Not optional. Poles reduce knee strain by 25 to 30 percent on descents. We can provide rental poles at basecamp.
- Headlamp: Mandatory. Summit day starts at 3 AM. Carry spare batteries in a warm pocket.
- Sunglasses: UV-rated Category 3 or 4. Snow reflects UV light at altitude. Snow blindness is a real risk above 10,000 feet on clear days.
- Rain cover: For your backpack. Sudden afternoon rain happens in spring and pre-monsoon months.
- Power bank: Minimum 10,000 mAh. Keep inside your sleeping bag at night. Lithium batteries drain fast below zero. Charging is not available on the trail.
Personal Essentials
- Diamox (AMS prevention, consult your doctor first)
- Basic pain relief and fever medication
- Anti-diarrheal and antacid tablets
- Crepe bandage, gauze, band-aids
- ORS packets
What NOT to Carry
Heavy jeans or cotton clothing. Cotton absorbs sweat and refuses to dry at altitude. This is how hypothermia starts. More than 8 to 9 kg total backpack weight. If your bag is heavier, use our offloading service. Carry a daypack with water, snacks, sunscreen, rain cover, and a warm layer. Leave the rest.
How to Get Fit for the Sar Pass Trek
Getting fit for the Sar Pass Trek takes regular training and does not require a gym. Start preparing 6–8 weeks before the trek with brisk walking, jogging and stair climbing to build stamina. Add squats, lunges, step-ups and calf raises to strengthen your legs for long climbs and descents. Once a week, go for a longer walk of around 8–12 km and gradually carry a light backpack. Include simple core exercises such as planks to improve balance and stability. Keep one or two rest days each week so your body can recover. Stay hydrated, eat a balanced diet with enough carbohydrates and protein, and get proper sleep. In the final week, reduce your workout intensity and focus on recovery before the trek.
The Fitness Benchmark
Run this test tomorrow. If you pass all three, you are ready for the Kedarkantha trail.
If you cannot clear these right now, you have 6 weeks. That is enough. Follow the plan below.
Weeks 1–2: Start with 30–45 minutes of brisk walking 4–5 days a week. Add simple exercises such as squats, lunges, step-ups and calf raises to build leg strength. On the weekend, take a 5–7 km walk at a comfortable pace. Focus on building a regular routine rather than increasing intensity quickly.
Weeks 3–4: Increase your walking or jogging time to 45–60 minutes. Continue strength exercises and add planks and glute bridges for better core stability. Take a longer 8–10 km walk once a week and start carrying a light backpack of around 3–4 kg. Include stair climbing to prepare your legs for steep sections.
Weeks 5–6: Focus on endurance by doing 50–60 minutes of walking, jogging or stair climbing on most training days. Take a 10–12 km weekend walk with a 4–5 kg backpack. During the final few days, reduce the training load and allow your body to recover. Keep your meals balanced, stay hydrated and get enough sleep before starting the trek.
If you are not physically fit for the Sar Pass Trek, the trek can feel much harder than expected. You may get tired quickly, struggle on steep climbs, walk slowly, or need longer breaks. On summit day, the combination of long walking hours, steep sections, snow, and high altitude can make the effort even more demanding.
Low fitness can also make it harder to maintain a steady pace with the group. You may experience muscle soreness, breathlessness, cramps, or exhaustion, especially if you are not used to walking uphill with a backpack. Poor preparation does not automatically mean you cannot complete the trek, but it increases the chance of struggling or having to stop.
The best approach is to start training 6–8 weeks before the trek with brisk walking, jogging, stairs, squats, lunges, and longer weekend walks. If you develop severe headache, vomiting, dizziness, unusual weakness, or difficulty breathing at altitude, inform your trek leader and descend if advised.
People above 55, children, and trekkers with existing medical conditions should take extra care before joining the Sar Pass Trek. The trek involves long walking hours, steep climbs, snow sections, and high altitude, so basic fitness is important. Older trekkers should get medical advice and build their fitness gradually before the trek. Children should be comfortable with long-distance walking and should always trek with a responsible adult. Anyone with asthma, heart problems, blood pressure issues, diabetes, joint problems, or any other medical condition should consult a doctor before planning the trek. Carry prescribed medicines and inform the trek leader about any important medical condition. If you feel unwell during the trek, do not ignore the symptoms or try to push through them.
Sar Pass Trek Cost: Complete Pricing Breakdown
No ranges. No “starting from” estimates. Here is the exact cost.
| EXPENSE | APPROX. COST | DETAILS |
|---|---|---|
| Trek Package | ₹5,500–₹10,000 | Accommodation, meals, guides, camping equipment and trek support |
| Travel to Kasol | ₹1,000–₹3,000 | Bus, shared cab or other transport from your city to Kasol |
| Personal Expenses | ₹500–₹1,500 | Snacks, drinks, toiletries and other small expenses |
| Trekking Gear | ₹500–₹2,500 | Rental cost for shoes, jacket, trekking pole or other equipment |
| Offloading | ₹1,000–₹1,500 | Optional cost if you want a porter or mule to carry your backpack |
| Trek Insurance | ₹350 onwards | Optional trek insurance starting from ₹350 |
| Total Estimated Cost | ₹8,350–₹15,350+ | Approximate budget including trek package and basic additional expenses |
What Is Included
- Accommodation during the trek in tents or basic stays as per the itinerary
- All meals during the trek, including breakfast, lunch, evening snacks and dinner
- Experienced trek leader and support staff
- Camping equipment, including tents, sleeping bags and mats
- First-aid kit and basic medical support
- Necessary forest and trekking permits
- Trekking equipment required by the operator
- Transportation between the trek start and end points as mentioned in the itinerary
- Emergency support during the trek
- Trek insurance, if selected or included in the packag
What Is Not Included
- Travel from your hometown to Kasol and back
- Hotel stay in Kasol before or after the trek unless mentioned in the package
- Personal expenses such as snacks, drinks and phone calls
- Personal trekking gear such as shoes, jackets, backpacks and trekking poles
- Porter or backpack offloading charges, if required
- Any additional transport caused by route changes or delays
- Medical expenses beyond the basic first-aid support
- Emergency evacuation or rescue costs, unless specifically covered by the trek insurance
- Any expense caused by bad weather, roadblocks, natural events or changes beyond the operator’s control
The trek package does not always cover every expense. Keep some extra money for small costs that can add up during the trip.
Travel to Kasol and back – Your trek package may start and end at Kasol, so transport from your city is usually extra.
Hotel before or after the trek – You may need an extra night in Kasol if you arrive early or return late.
Trekking gear rental – Shoes, jackets, backpacks, trekking poles and other gear may cost extra if you do not own them.
Backpack offloading – Porter or mule charges can be added if you do not want to carry your full backpack.
Trek insurance – If not included in your package, insurance can start from around ₹350.
Snacks and personal food – Chocolates, dry fruits, energy bars and drinks can increase your daily spending.
Hot showers and charging – Some stays may charge separately for hot water or device charging.
Emergency transport – Unexpected transport due to illness, injury or route changes may not be included.
Extra accommodation – Bad weather or transport delays may require an additional night.
Personal medicines and toiletries – These are normally your responsibility.
Tips – You may want to keep a small amount for tipping trek staff, guides or support teams.
Cash – Kasol and higher trail areas may have limited network and digital payment options, so carrying some cash is useful.
Our Sar Pass Trek price covers more than just a place in a tent. It includes the people, equipment, food, permits and support needed to run the trek safely and smoothly. We keep the price based on the actual services provided rather than adding unnecessary costs.
- Experienced trek team: Trek leaders and support staff stay with the group throughout the trek.
- Good-quality meals: We provide simple, nutritious meals that help you stay active during long trekking days.
- Camping equipment: Tents, sleeping bags, mats and other basic camping equipment are arranged for the trek.
- Permits and local charges: Required permits, forest charges and other local fees are included where applicable.
- Safety support: First-aid supplies, emergency planning and trained staff add to the operating cost.
- Local staff and logistics: Porters, cooks, camp staff and transport providers are paid for their work.
- Equipment transport: Camping gear, food and supplies have to be carried to remote camps where vehicles cannot reach.
- Trek insurance: Insurance can be added from ₹350 onwards, depending on the plan and coverage.
- Small-group support: Managing a trek group requires planning before, during and after the trek.
| CANCELLATION TIME | REFUND | POLICY |
|---|---|---|
| 30+ Days Before Trek | 90% Refund | 10% of the booking amount is retained as cancellation charges. |
| 15–29 Days Before Trek | 75% Refund | 25% of the booking amount is retained as cancellation charges. |
| 7–14 Days Before Trek | 50% Refund | 50% of the booking amount is retained as cancellation charges. |
| 0–6 Days Before Trek | No Refund | Cancellation within 6 days of the trek departure is non-refundable. |
| After Trek Starts | No Refund | No refund is provided after the trek has started or if you leave the trek midway. |
| Operator Cancellation | Full Refund | If the trek is cancelled by the operator due to unsafe weather, government restrictions or other unavoidable conditions, a full refund or alternative date may be offered as per the applicable policy. |
- Follow all instructions given by the trek leader and support team throughout the trek.
- Stay with the group and do not take shortcuts or leave the marked trail.
- Wear proper trekking shoes with good grip, especially on steep, rocky and snow-covered sections.
- Carry enough water and drink regularly during the trek.
- Inform the trek leader immediately if you experience severe headache, dizziness, vomiting, breathing difficulty or unusual weakness.
- Do not continue climbing if you develop serious altitude-related symptoms.
- Descend to a lower altitude when advised.
- Weather can change quickly in the mountains.
- The trek schedule or route may be changed for safety.
- Do not attempt the Sar Pass summit without the trek leader’s approval.
- Carry essential personal medicines, a basic first-aid kit, headlamp and suitable warm and waterproof clothing.
- Avoid alcohol and other substances during the trek.
- Keep your emergency contact details and identification documents with you.
- Do not litter. Follow the trek team’s instructions for waste disposal.
- Emergency evacuation, if required, will depend on weather, trail conditions, accessibility and available rescue support.
- Participants must disclose relevant medical conditions before the trek and should seek medical advice if they have concerns about trekking at high altitude.
Kadol to Kasol
(Transportation Not Included)
Upcoming Batches
Sar Pass Trek: Frequently Asked Questions
How difficult is the Sar Pass Trek?
It’s graded easy to moderate overall. Day 4, the climb from Nagaru over the pass, is genuinely hard. The rest suits a reasonably fit beginner.
What is the best time for the Sar Pass Trek?
April through June. April and early May bring heavier snow and a harder pass crossing. Late May into June offers an easier, drier climb with less snow.
How much does the Sar Pass Trek cost?
Roughly ₹6,000 to ₹15,000 as of 2026, before GST and add-ons like backpack offloading or transport. Confirm current rates directly with your chosen operator.
What is the maximum altitude of the Sar Pass Trek?
Around 13,600 to 13,800 feet at the pass itself, depending on the source and measurement point.
Is the Sar Pass Trek suitable for beginners?
Yes, with reasonable fitness and preparation. It’s an accessible high-altitude snow trek by Himalayan standards, though Day 4 demands real physical and mental readiness.
Do I need prior trekking experience?
No, though some prior hiking helps. A structured 3-4 week fitness ramp matters more than past experience for most first-timers.
Is mobile network available during the trek?
Grahan is the last reliable signal point. Expect no network from Day 2 onward, with occasional patchy coverage at some camps.
Do I need to carry my own backpack?
Not necessarily. Offloading is available with most operators for an extra charge. It’s worth considering for first-timers, given the demands of Day 4.
Treks Similar to Kedarkantha: What to Do Next
Brahmatal Trek
Brahmatal’s summit sits at 12,250 feet, just 250 feet lower than Kedarkantha. The trekking distance is longer at 22 km across 4 trekking days. The trail passes two frozen lakes instead of one. The mountain views are different: Trishul and Nanda Ghunti dominate the skyline instead of Swargarohini and Bandarpoonch. If you loved the snow and summit experience on the Kedarkantha trail and want a similar challenge with new scenery, Brahmatal is the natural next step. Best done in January or February.
Har Ki Dun
Har Ki Dun runs 7 days and covers 45 km through the same national park. Both treks start from Sankri. The difficulty is comparable, but the longer duration tests endurance more than altitude. The route follows the Supin River through ancient Garhwali villages. Swargarohini appears up close from the valley floor. If you want to go deeper into the same mountain range, this is the trek.
Dayara Bugyal
Dayara Bugyal is a high-altitude meadow trek that peaks at around 11,800 feet. The gradient is gentler than Kedarkantha. The meadows are wider. No steep summit push. If you are trekking with children under 8 or family members who prefer rolling green terrain over snow and summits, Dayara Bugyal is the safer introduction.
Deoriatal Chandrashila
Deoriatal Chandrashila combines a lake, a temple (Tungnath), and a summit (Chandrashila, 13,123 ft). The trek is 6 days and mixes cultural stops with mountain trail. If you want more variety in terrain and experience types than Kedarkantha offers, this trek delivers that range.
Further Reading on the Kedarkantha Trek
How We Started Running the Kedarkantha Trek from Sankri — by our founder. The origin story of our Sankri operations, why we chose this route, and what we learned in the first three seasons.
Kedarkantha Trek in January: A Complete Month Guide — by Sneha, who trekked with us in January 2026. Trail conditions, crowd levels, and what surprised her about deep winter on this route.
What Our Youngest Trekker Taught Us About the Kedarkantha Trail — by trek leader Vikram. The story of Aarav Kapoor, age 10, and how his pace changed how we think about family batches.
Kedarkantha vs Brahmatal: Which Winter Trek Should You Do First? — A head-to-head comparison by a trekker who did both in the same season.
The Season-Wise Kedarkantha Packing Guide — with month-by-month clothing recommendations and a downloadable checklist.
